
TM 5-4210-233-14&P-2
6-65. AIR COMPRESSOR-Continued
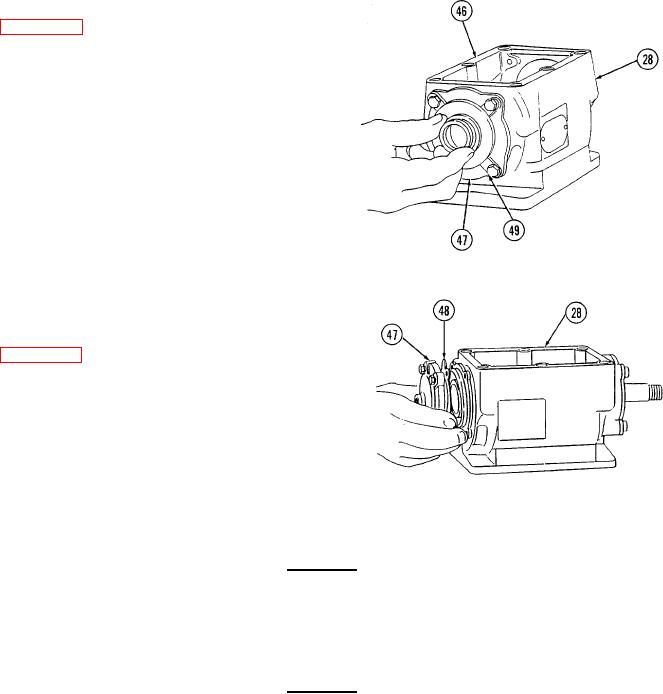
(1) Press new oil seal (46) into front bearing cap
(47). Use seal retainer compound (Item 6,
Appendix E) on seal's outer rim. Spring side
of seal must face inside of crankcase when
installed. Seal case should be flush to .005
inch (.13 mm) below front of cap.
(2) Crankshaft (42) should be installed in
crankcase (28) before front (47) or rear (40)
end caps are installed. Ball bearings should
already be pressed on crankshaft. Press
crankshaft and bearing assembly into
crankcase. Be sure that both front and rear
bearings protrude an equal amount from
each end of crankcase. Rotate crankshaft
to be sure it turns freely.
(3) Place new gasket (48) on crankcase front cap
mating surface.
(4) Apply small amount of engine oil (item 10,
Appendix E) to crankshaft seal (46). Slide front
bearing cap (47) over crankshaft end. Do not
damage oil seal.
(5) Place new gasket on rear end cap (40) mating
surface. Install spring or bowed washer in end
cap. Outer diameter of bowed washer must
contact bottom of hole in end cap. Install new
seal in end cap. Lubricate seal with oil. Install
end cap making sure seal and spring or bowed
washer do not fall out.
CAUTION
Do not overtighten bolts.
(6) Pull both front and rear bearing caps into position by alternately tightening four attaching bolts (39
and 49). Torque to 120 to 160 in. Ibs (13.6 to 18.1 Nm).
CAUTION
Crankshaft should revolve freely after assembling cap.
6-393