 |
|||
|
|
|||
|
|
|||
| ||||||||||
|
|
 hose reel switch on the instrument panel.
103. Hose Reel Motor Solenoid Relay
b. Cleaning, Inspection, and Repair.
(1) Clean all parts with a clean cloth
dampened in an approved cleaning
solvent, and dry thoroughly.
(2) Inspect all parts for damaged or defective
condition.
(3) Inspect lamp for cracks, breaks, or burned
out condition.
(4) Replace or repair damaged or defective
parts as necessary.
hose reel motor solenoid relay on the hose reel.
104. Hose Reel Motor
hose reel motor from the hose reel.
b. Cleaning, Inspection, and Repair.
(1) Clean all parts with a clean cloth
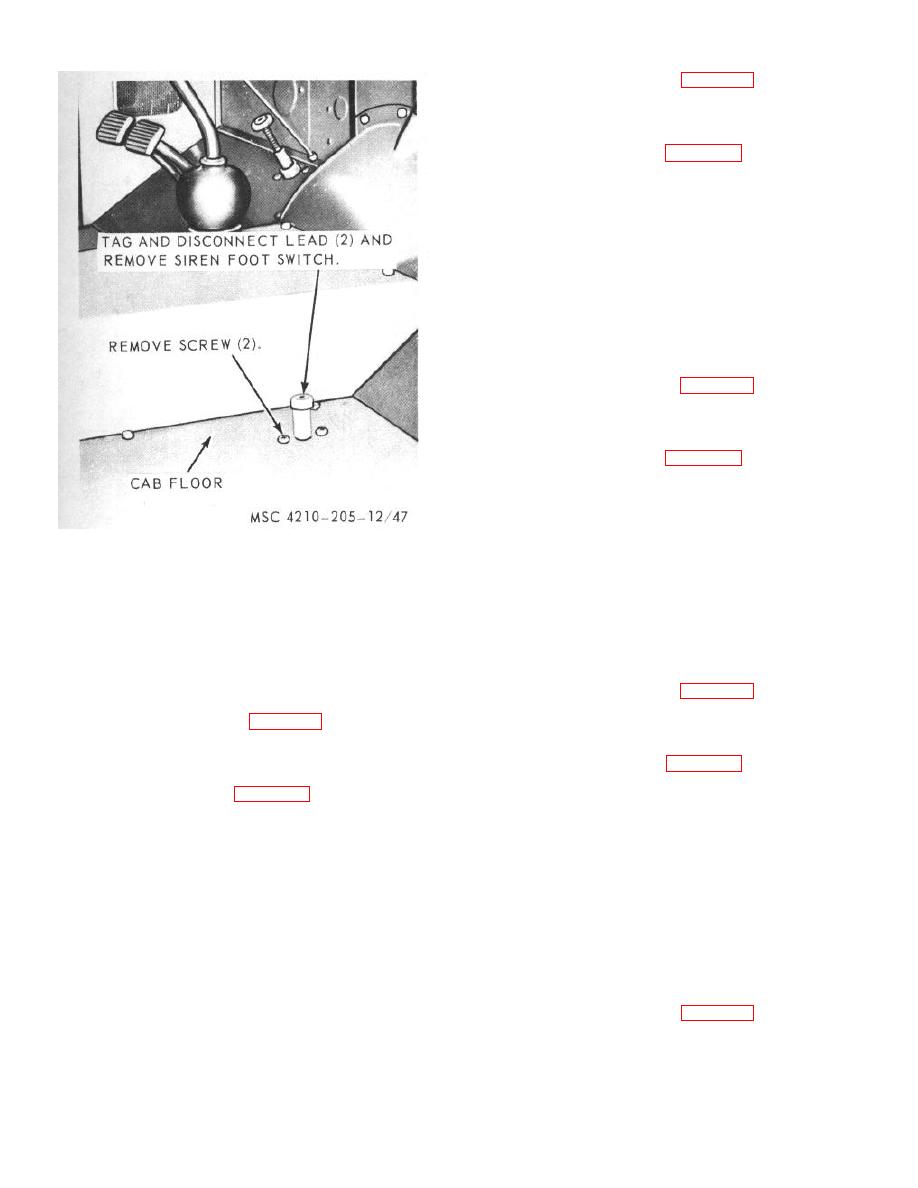
Figure 47. Siren foot switch, removal and
dampened in an approved cleaning
installation.
solvent, and dry thoroughly.
(2) Inspect all parts for damaged or defective
(1) Clean all parts with a clean cloth
condition.
dampened in an approved cleaning
(3) Inspect lamp for cracks, breaks, or burned
solvent, and dry thoroughly.
out condition.
(2) Inspect all parts for damaged or defective
(4) Replace or repair damaged or defective
condition.
parts as necessary.
(3) Replace or repair damaged or defective
parts as necessary.
hose reel motor on the hose reel.
105. Primer Pump Motor Solenoid Relay
engine light switch on the instrument panel.
102. Hose Reel Switch
primer pump motor solenoid relay from the primer
pump.
hose reel switch from the instrument panel.
b. Cleaning, Inspection, and Repair.
b. Cleaning, Inspection, and Repair.
(1) Clean all parts with a clean cloth
(1) Clean all parts with a clean cloth
dampened in an approved cleaning
dampened in an approved cleaning
solvent, and dry thoroughly.
solvent, and dry thoroughly.
(2) Inspect all parts for damaged or defective
(2) Inspect all parts for damaged or defective
condition.
condition.
(3) Inspect lamp for cracks, breaks, or burned
(3) Replace or repair damaged or defective parts as
out condition.
necessary.
(4) Replace or repair damaged or defective
parts as necessary.
TAGO 6839A
70
|
|
Privacy Statement - Press Release - Copyright Information. - Contact Us |
