DRAFT
TM 5-4210-249-13&P-3
0544
- - - - - - - - - - - - - - - - - - - - - - - - - - - - - - - - - - - - -
TFFT1491
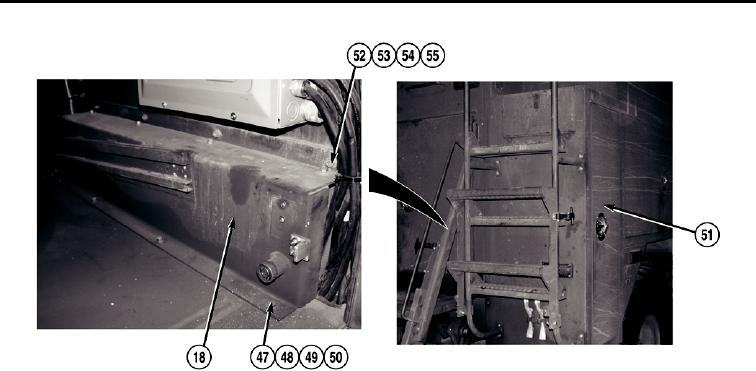
19. Remove four nuts (47), lockwashers (48), eight washers (49), and four screws (50) from bracket (18) and
vehicle. Discard lockwashers.
20. Open compartment door (51) (WP 0010).
21. Remove four nuts (52), lockwashers (53), eight washers (54), four screws (55), and bracket (18) from vehicle.
Discard lockwashers.
END OF TASK
INSTALLATION
1.
Install bracket (18) on vehicle with four screws (55), eight washers (54), four lockwashers (53), and nuts (52).
2.
Close compartment door (51) (WP 0010).
3.
Secure bracket (18) on vehicle with four screws (50), eight washers (49), four lockwashers (48), and nuts (47).
4.
Install spring stop (46) and guide (45) on rear compartment utility tray (2) with screw (44). Do not tighten
screw.
NOTE
Install latches as noted prior to removal.
Both latches are installed the same way.
5.
Install spring (43) and latch (42) on rear compartment utility tray (2) with finger latch (1).
NOTE
Moving spring stop closer to rear compartment utility tray edge increases spring tension,
moving spring stop further from rear compartment utility tray edge decreases spring
tension.
6.
Adjust spring stop (46) to desired spring tension and tighten screw (44).
0544-5

