|
| |
TRUCK SERVICE MANUAL
TM 5-4210-230-14&P-1
BODIES AND CABS
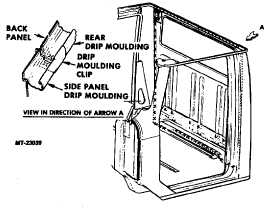
Fig. 50. Securing Drip Moulding Clip
4.
Obtain drip moulding clip and position clip so as to
close joint between old drip moulding on back of cab
and drip moulding on new side panel (Fig. 50).
Secure with one plug weld at each side of joint.
5.
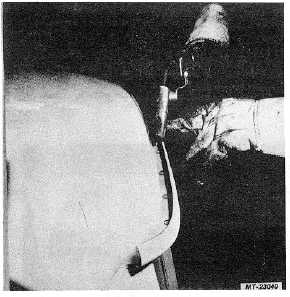
Clamp outer roof panel to drip moulding of new side
panel assembly and plug weld roof panel to moulding
(Fig. 51).
6.
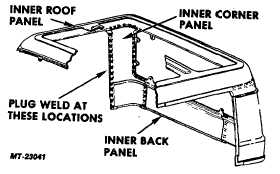
Plug weld through holes drilled for removing to
replace inner corner panel to inside of cab (Fig. 52).
If new inner corner panel is used, plug weld holes
must be drilled into new panel before welding.
Fig. 51. Fastening Roof Panel To New Side Panel
Fig. 52. Installing Inner Corner Panel (Right Side - 80" Wide
Cab Shown)
7.
Grind, sand or wire brush away any excess weld or
weld ash from all newly welded areas.
8.
Obtain body sealant (Plastisol Type 1 or equivalent)
and apply to the following locations:
a.
Roof panel to drip moulding seam.
b.
Side panel to back panel joint at rear of cab.
c.
Dash filler panel to dash panel joint at front of
cowl.
d.
Drilled out holes on upper side of sill side inner
panel to rocker panel seam (under cab).
9.
Apply primer paint to affected areas to assure good
protection from rust. Finish paint as required.
OTHER PANEL REPAIRS
Since each cab panel component contributes to the
overall strength of the cab, proper welding, sealing and rust-
proofing practices must be observed for any other panel
replacement. Under-cab components especially should be
rust-proofed whenever cab repair operations are performed.
When rust-proofing cab components, use a good quality
air-dry zinc rich primer. Combination type primer-surfacer
paints are not recommended. Finish paint as required.
CTS-2714R Page 28
PRINTED IN UNITED STATES OF AMERICA
|


