|
| |
TM 750-116
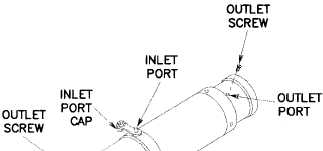
3-4. COLLIMATOR, M1A1 (fig. 3-3).
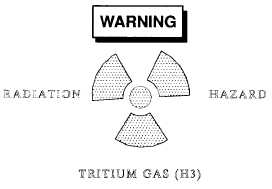
HANDLE WITH CARE. IN THE EVENT
THE RADIOLUMINOUS SOURCE IS
BROKEN, CRACKED, OR SUDDENLY
LOSES ILLUMINATION, DO NOT AT-
TEMPT TO REPAIR. IMMEDIATELY
DOUBLE WRAP INSTRUMENT IN PLAS-
TIC AND NOTIFY THE LOCAL RADI-
ATION PROTECTION OFFICER (RPO).
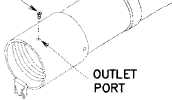
F i g u r e 3 - 3 M 1 A 1 C o l l i m a t o r
NOTE
Actual location of outlet port screws may vary
from location shown in illustration due to coli-
mator adjustments.
a.
b.
c.
NOTE
For sealing the collimator, the two stage fixture
is required (refer to para 2-2.b.). For regular
purging and charging, the single stage fixture may
be used (refer to para 2-2.a.).
Perform purging and charging procedure para 2-5.b.
Purge instrument at 3 psig for 5 minutes.
Check to be sure nitrogen is escaping from both out-
let ports.
d. Charge instrument at 3 psig maintaining pressure for
10 seconds.
e.
Leak test for a minimum of 5 minutes.
f.
Remove hose assembly and release all pressure by
depressing inlet port valve stem.
g. Reconnect hose assembly and charge instrument at 1
psig for 10 seconds.
h. Install inlet port cap.
3-5. COMPUTER, M21 ELECTRONIC
(figs. 3-4 through 3-9).
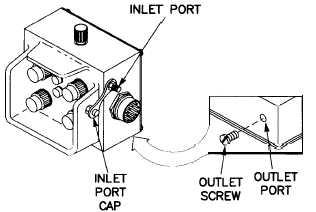
a. Ammo Select Unit - two each (fig. 3-4).
. . . . . .
\
Figure 3-4 Ammo Select Unit
(1) Perform purging and charging procedure para
2-5.b.
(2) Purge each unit at 8 psig for 5 minutes.
(3) Charge each unit at 1 psig maintaining pressure
for 10 seconds.
(4) Leak test for a minimum of 5 minutes.
3-3
|


