|
| |
TM 750-116
SECTION II
SPECIFIC INSTRUMENTS
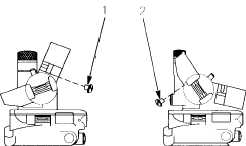
g. Purge instrument at 5 psig for 5 minutes.
h. Remove adapter assembly and install self-sealing
DO NOT EXCEED THE PRESSURES IN-
screw (2).
DICATED THROUGHOUT THE FOL-
LOWING PROCEDURES.
i.
Elevate elbow telescope to about 800 mils.
j. Install self-sealing screw (1).
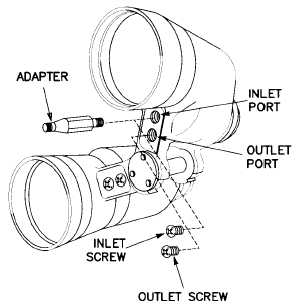
3-2. AIMING CIRCLE, M2A2 (fig. 3-1).
k. Return elbow telescope to zero mils.
SELF-SEALING
SELF-SEALING
SCREW
SCREW
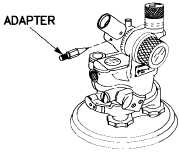
3-3. BINOCULAR, M19 (fig. 3-2)
NOTE
Both sides of the binocular must be purged indi-
vidually. Repeat procedure para 2-5.d. for both
sides.
Figure 3-1 M2A2 Aiming Circle
a.
Perform purging procedure para 2-5.d.
b. Depress elbow telescope to about 400 mils.
c.
Remove self-sealing screw (1).
d. Elevate elbow telescope until self-sealing screw (2)
is accessible.
e.
Remove self-sealing screw (2).
NOTE
On aiming circle with only one self-sealing
screw, remove one of the reticle setscrews to
purge. Apply sealing compound (item 6, appx B)
to setscrew to reinstall.
f. Install adapter assembly with 8-32 UNC-2A
threads.
Figure 3-2 M19 Binocular
a.
Perform purging procedure para 2-5.d.
b. Purge instrument at 5 psig for 5 minutes.
3-2
|