|
| |
TM 750-116
(10) Check outlet port screw to ensure seal on screw
is serviceable. Replace self-sealing screw if necessary. If
other than self-sealing screw is used, sealing compound
(item 6, appx B, unless otherwise specified) must be applied
to screw before installing.
(11) Install outlet port screw with any accompanying
gasket/preformed packing.
(12) Remove hose assembly.
(13) Install inlet port cap.
(14) For bleed down procedures, refer to para 2-3.
d. Purge Only - Inlet Port Screw, Outlet Port
Screw(s). This procedure is used when instrument does
not hold a charge.
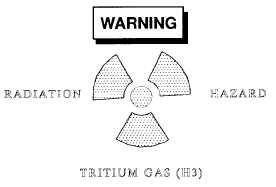
HANDLE WITH CARE. IN THE EVENT
THE RADIOLUMINOUS SOURCE IS
BROKEN, CRACKED, OR SUDDENLY
LOSES ILLUMINATION, DO NOT AT-
TEMPT TO REPAIR. IMMEDIATELY
DOUBLE WRAP INSTRUMENT IN PLAS-
TIC AND NOTIFY THE LOCAL RADI-
ATION PROTECTION OFFICER (RPO).
(1) Remove inlet port screw from instrument to be
purged.
(2) Inspect inlet port for cleanliness. Remove any dirt
or foreign matter.
Ensure regulator valve is closed (counter-
clockwise - CCW) or damage may occur to
regulator.
To avoid damage to instruments being
purged, do not exceed maximum pressure.
Unless otherwise noted for specific instru-
ment, maximum pressure is 10 psi.
(3) Install specified purge adapter in inlet port.
(4) Connect hose assembly to purge adapter on the
instrument.
(5) Open main valve on nitrogen tank (CCW).
(6) Remove outlet screw(s) (unless otherwise directed
for specific instrument) and any accompanying gasket/pre-
formed packing.
(7) Open regulator valve (clockwise - CW) until
specified purge pressure is indicated on low pressure gage.
(8) Watch low pressure gage and listen for gas escap-
ing from outlet port(s). (Do not allow pressure to exceed
maximum specified pressure.
(9) Purge instrument for specified time. If moisture is
still present, a longer purge time may be required.
(10) Close the regulator valve (CCW).
(11) Check inlet and outlet port screws to ensure
seals on screws are serviceable. Replace self-sealing
screws if necessary. (If other than self-sealing screws are
used, sealing compound (item 6, appx B, unless otherwise
specified) must be applied to screw before installing.
(12) Install outlet screw(s) and any accompanying
gasket/preformed packing (if required).
(13) Remove hose assembly and adapter.
(14) Install inlet screw.
(15) For bleed down procedures, refer to para 2-3.
2-6
|

