|
| |
TRUCK SERVICE MANUAL
TM 5-4210-230-14&P-1
BODIES AND CABS
2.
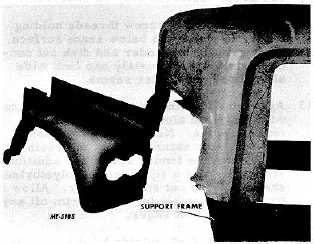
Using service fender for template, scribe line on hood
and remove remaining damaged portion of hood
assembly as shown in Fig. 7. Maintain a straight cut
on all edges. Before making cutout, measure down
one inch below scribe line to allow for service fender
flange overlap over hood for firm attachment base.
See Fig. 8.
Fig. 7 Service Fender and Damaged Hood Assembly.
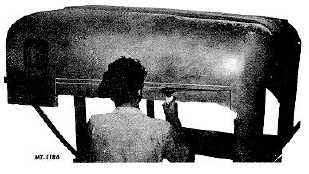
3.
Cut out any remaining portion of hood and fender in
damaged area. Maintain 90° angles at corners. See
Fig. 8. Recommended cutting tools are disc (carboflex
with masonry blade) or sabre saw with steel blade.
NOTE: Use of face mask and safety goggles are
required as protective equipment.
Fig. 8 Service Fender Cutout.
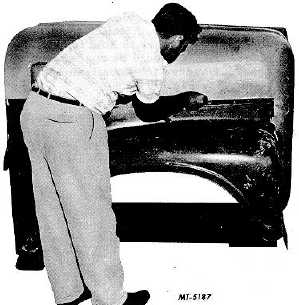
4.
Recheck service fender alignment with cutout. Special
precautions should be taken to remove all road film or
undercoating
with
acetone.
Stiffener
surfaces
must be ground down to service fender thickness to
insure proper bonding. Grind all surfaces and edges to
be bonded down to mat surface. Use coarse
sandpaper (A.L.O. 26, 36 or 50 grit).
5.
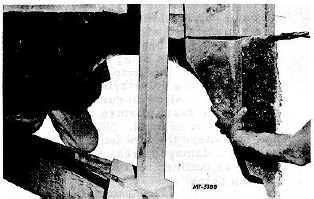
Secure finder to hood with "C" clamps. Locate fender
flanges to inside of hood. See Fig. 9.
Fig. 9 Service Fender Positioning.
Fig. 10 Reinforcement Service Fender Rear.
CTS-2408 Page 5
PRINTED IN UNITED STATES OF AMERICA
|