 |
|||
|
|
|||
|
|
|||
| ||||||||||
|
|
 TM5-4210-224-14&P
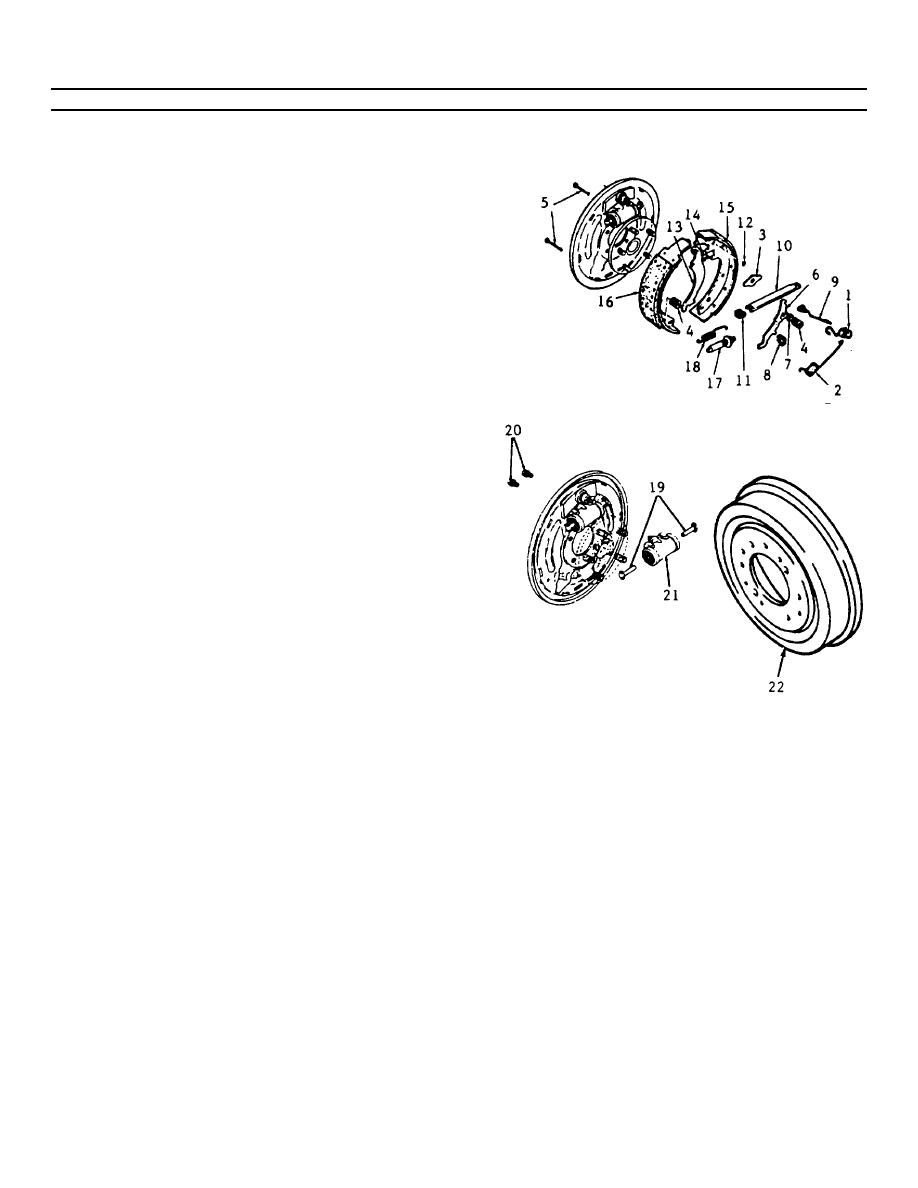
4-219. REAR DRUM BRAKE REPLACEMENT. (Continued)
i. Remove the actuator lever (6) and lever pivot
(7).
j. Remove the lever return spring (8) and actuator
link (9).
k. Remove the parking brake strut (10) and strut
spring (11).
l. Remove the retaining ring (12) parking brake
lever (13) and washer (14).
m. Remove the brake shoes (15 and 16).
CAUTION
Do not interchange the right and
left adjusting screws.
n. Remove the adjusting screw assembly (17) and
adjusting screw spring (18).
o. Remove cylinder links (19) and disconnect inlet
tube line.
p. Remove wheel cylinder bolts (20) and lift off
wheel cylinder (21).
q. Check all parts for signs of wear, discoloration
due to heat, or stress, and replace if necessary.
r. Check the wheel cylinder for signs of leakage.
s. Check the brake drum (22) for scoring and
machining tolerance.
CAUTION
A cracked drum is unsafe for
CAUTION
further service and must be
Machining or grinding of brake
replaced. Do not attempt to weld a
drums
increases
the
inside
cracked drum.
diameter of the drum and changes
the lining-to-drum fit. All brake
drums have a maximum diameter
cast into them. This diameter is
the maximum wear diameter. Do
not machine a brake drum that will
not
meet
the
following
specification.
(1) Smooth up and polish slight scores or
grooves with fine emery cloth.
(2) Machine drums with severe scoring,
pitting, grooves or barrel shaped, bell-
mouthed or out-of-round condition.
4-304
|
|
Privacy Statement - Press Release - Copyright Information. - Contact Us |
