 |
|||
|
|
|||
|
|
|||
| ||||||||||
|
|
 TM 5-4210-224-14&P
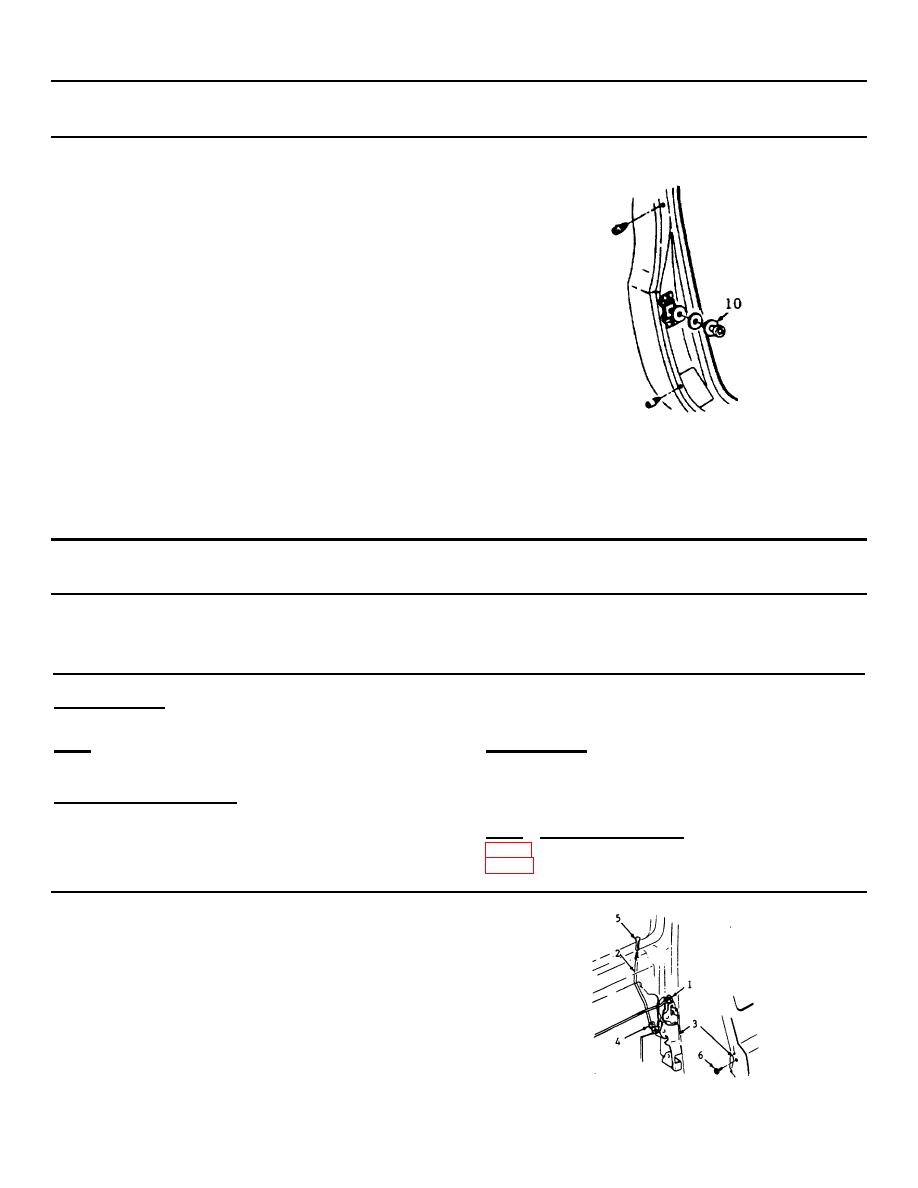
4-160. DOOR REPLACEMENT (Continued).
f.
Adjust the gap between the door (3) rear
edge and the rear pillar (8) to 0.19 inch
.09 inch (5mm 2mm).
g.
Adjust the gap between the door (3) and the
windshield pillar (9) to 0.08 inch 0.06 inch
(2mm 1.5mm).
h.
Make adjustment so that door surface is
flush with the other panels within 0.06 inch
( 1.5mm) except for the door to roof panel
surface which should be flush within 0.06
inch ( 1.5mm).
i.
Torque hinge bolts to 23 ft-lbs (30 N-m).
k.
Torque the striker bolt (10) to 46 ft-lbs (63
j.
If necessary, adjust the door striker bolt (10)
N-m).
with the wrench as that the bolt properly
engages the door lock.
l.
Reconnect batteries.
4-161. DOOR LOCK REPLACEMENT.
This task covers:
a. Removal
b. Installation
INITIAL SETUP:
Tools
Materials/Parts
General Mechanics Tool Kit
Curbside Lock (14039763)
Streetside Lock (14039764)
General Safety Instructions
Equipment Condition
Engine OFF.
Para. Condition Description
Transmission in (N) neutral.
Parking brake and micro-brakelock set.
REMOVAL
a.
Raise the window completely.
b.
Remove the clip (1) from the inside handle
rod to lock by pushing on the tip of the clip
where it is connected to the rod using a flat-
bladed screwdriver pivot the clip away from
the rod.
4-218
|
|
Privacy Statement - Press Release - Copyright Information. - Contact Us |
