 |
|||
|
|
|||
|
|
|||
| ||||||||||
|
|
 TM 5-4210-224-14&P
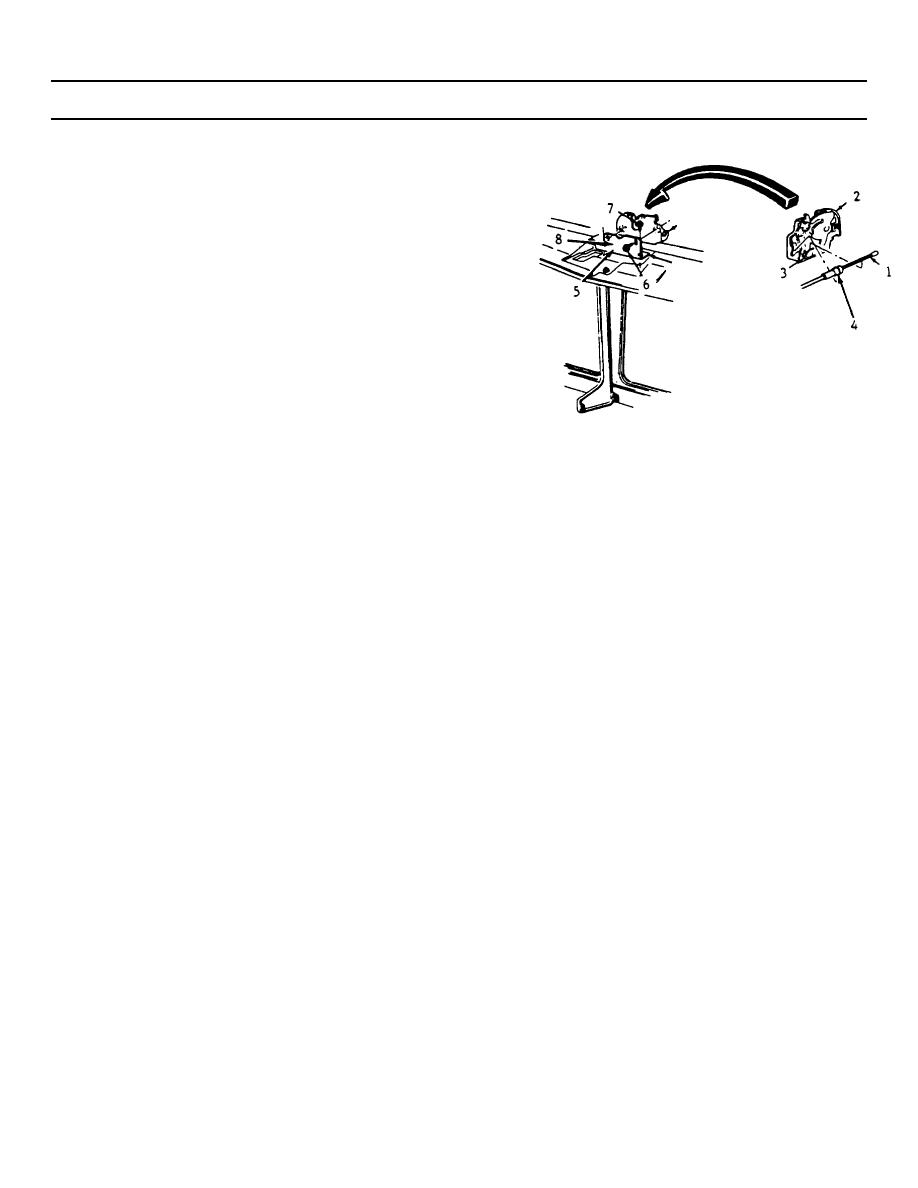
4-151. PRIMARY HOOD LATCH REPLACEMENT (Continued).
e.
Remove the hood latch (2) from the vehicle.
INSTALLATION
a.
Install the primary hood latch (2) to the
bracket (7) by installing the bracket bolts (6)
loosely. Do not tighten at this time.
b.
Install the hood latch release cable (1) to the
latch (2) by affixing the cable grommet (4)
to the lock flange, then inserting the cable
into the cable clip (3).
c.
Lower the hood and adjust the hood latch
bracket (7) on right until the striker in the
hood easily engages the primary latch (2).
d.
Adjust the hood latch height so that when
the hood is closed, the hood is held securely
b.
Adjust the hood latch bracket (8) left or right
against the front hood bumpers.
(If
until the striker in the hood easily engages
necessary, adjust the front hood bumpers so
the primary latch.
that the top of the hood is flush with the
fenders.) Mark this height.
c.
Raise the hood and torque the bracket to
the radiator support bolts (7) to 20 ft-lbs (27
e.
Raise the hood and tighten the bracket to
N-m).
hood latch bolts (6) at the set height mark to
20 ft. lbs. (27 N-m).
d.
Adjust the hood latch height so that when
the hood is closed, the hood is held securely
ADJUSTMENT
against the front hood bumpers.
a.
Raise the hood and loosen the bracket to
e.
Adjust the front hood bumpers, if necessary,
support bolts (7) and latch to bracket bolts
so that the top of the hood is flush with the
(6).
fenders. Mark this height.
f.
Raise the hood and torque the bracket to
hood latch bolts (6) at the set height mark to
20 ft lbs (27 N-m).
4-206
|
|
Privacy Statement - Press Release - Copyright Information. - Contact Us |