|
| |
TM 5-4210-220-12
4-9 GENERAL MAINTENANCE PROCEDURES - Continued.
TEFLON HOSE - Medium Pressure (with Vacuum Service)
(1) Carefully examine both hose end fittings. Discard hose end fittings if any sign of damage is evident.
Proceed to step 3 following, to assemble new hose assembly using new hose end fittings.
(2) If hose end fittings are to be reused, remove from old hose. Clamp socket in vise. Unscrew nipple (in a
counterclockwise direction) and remove. Slide the socket away from the hose end by tapping on flat surface. Using
pliers, pull the sleeve from hose
NOTE
It is recommended that new sleeves be used when old fitting is reused.
(3)
Wrap teflon hose with masking tape (item 18,
Appendix E) at cut-off area. Using a cut-off saw or a fine-
tooth hacksaw, cut hose square to length. Remove all tape.
Trim any extending wires flush with hose end, then remove
hose material burrs.
WARNING
Death or serious injury could occur if compressed
air is directed against the skin. Do not use
compressed air for cleaning or drying unless the
pressure is/has been reduced to 30 psi (2.11 kg/cm2)
or less. When working with compressed air always
use chip guards, eye protection and other personal
protective equipment.
(4)
Using compressed air, blow out shavings from
hose bore.
(5)
Slip two sockets onto new hose. Ensure the
sockets are back to back.
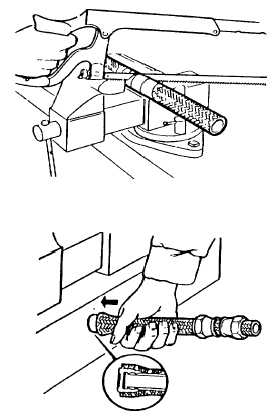
(6)
Push a sleeve over the end of the tube and under
the wire braid by hand. Position sleeve in hose by pushing
the hose against a flat surface. Ensure the tube stock butts
against the inside shoulder of the sleeve.
4-67
|