|
| |
TM 9-254
4-13.
Soldering Techniques - Continued
(4)
When the temperature of the shaft collar (3) and shouldered shaft (1) rises to a point that will cause the
solder to melt and flow into the joint, discontinue heating with the torch and apply solder (2) to form an
even-continuous fillet around the shaft collar and the shouldered shaft.
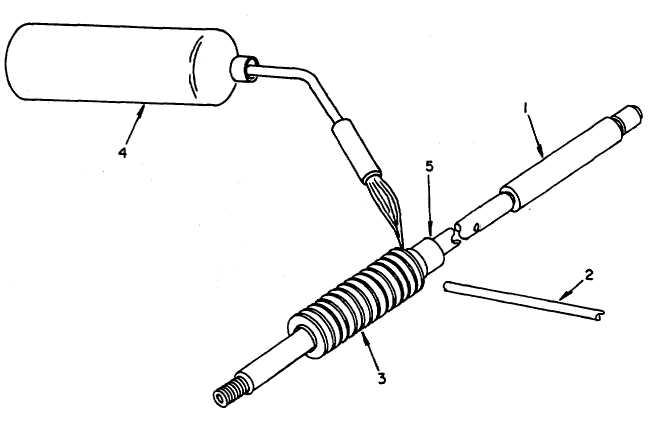
NOTE
In steps (5) and (6), refer to figure 4-28.
(5)
Position the bellows (3) onto the shouldered shaft (1) and up against the shaft collar (5). Preheat the
bellows and shaft collar with the torch. Periodically remove the flame of the torch from the area being
heated and apply solder (2) to the joint of the bellows and shift collar. If the solder does not melt into the
joint, remove solder and reapply heat from the torch.
KEY to figure 4-28:
1.
Shaft, shouldered
4.
Torch
2.
Solder
5.
Collar, shaft
3.
Bellows
Figure 4-28. Soldering Bellows to Shaft Collar
4-33
|