|
| |
TM 9-254
3-13.
Using Expendables - Continued
(2)
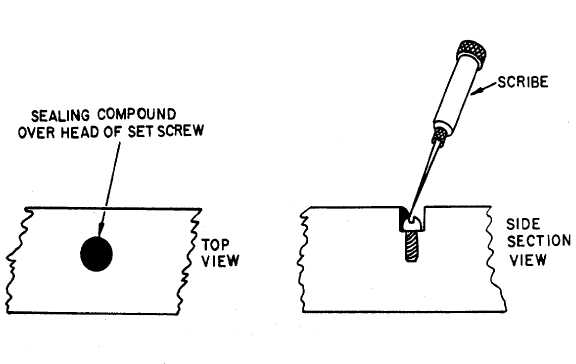
Using a screwdriver or hex key wrench, press firmly into the slot of the setscrew and remove.
(3)
Remove all traces of old sealing compound that remain in the hole.
Figure 3-38. Removing Sealing Compound from a Setscrew
NOTE
In steps (4) through (6), refer to figure 3-39.
(4)
If a curing type sealing compound is selected to seal the setscrew, it must be mixed. Use a clean
screwdriver or putty knife and scoop the base material from its container into a larger mixing container.
Use only enough base material to do the job at hand. When the accelerator is mixed into the base
material, the sealing compound will harden with time and cannot be reused.
(5)
Clean off the blade of the screwdriver or putty knife with a clean cloth and then scoop the required
amount of accelerator from its container into the mixing container with the base material.
(6)
Use the screwdriver or putty knife, and with a circular stirring motion, start at the center of the mixing
container and move toward the edge of the container. Repeat stirring motion until the two materials are
completely mixed.
3-37
|