|
| |
TM 9-254
3-4.
Staking - Continued
d.
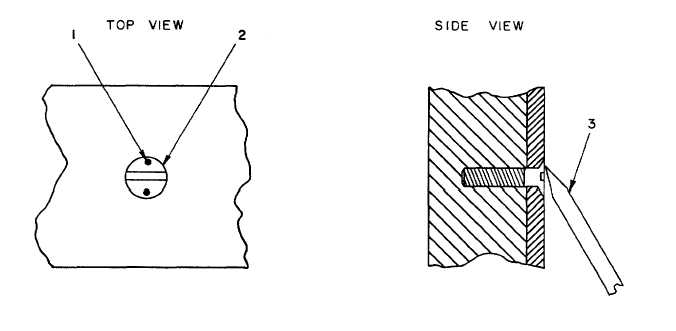
Staking Flathead Screw (fig. 3-6). A recommended procedure for staking a flathead screw is as follows:
(1)
Be sure that the flathead screw (2) is in the proper position and tightened.
(2)
Place center punch (3) on the flathead screw (2) near the edge.
(3)
With a medium weight ball peen hammer, give the punch (3) a solid tap.
(4)
Examine staking hole (1). If the metal has moved enough to lock the flathead screw (2), go on to the
next staking position.
(5)
If metal has not moved enough, move center punch closer to the edge of the flathead screw and tap with
hammer.
(6)
Stake second hole approximately 180 degrees from first hole (1) in the same manner. Check the
flathead screw (2) to see that it is locked in place.
Figure 3-6. Staking Flathead Screw
e.
Staking with Sealing Compound (fig. 3-7).
Another method of staking would be the use of sealing
compound instead of a punch and hammer. An example of this procedure would be the staking of the six cap screws (1)
in the eyepiece and erector lens subassembly of the M118 series Elbow Telescopes. In this example, the normal
procedure would be:
3-6
|

