|
| |
TM 9-254
4-18.
Resistance Soldering - Continued
CAUTION
Always release the foot pedal before placing the electrodes on the work surface or removing the
electrodes from the work surface. This will prevent arcing and damage to the equipment.
(4)
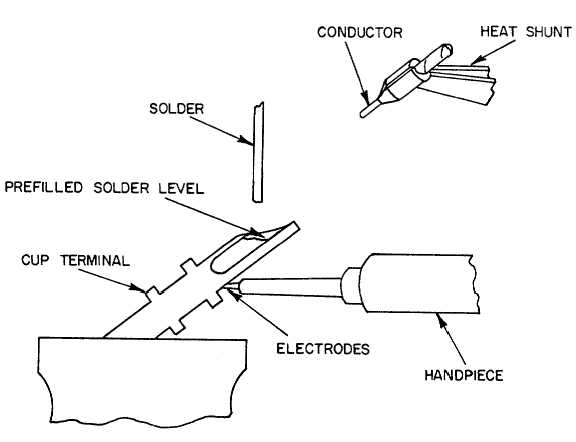
Place electrodes in contact with the bottom of the cup cavity. Press foot pedal (8, fig. 4-45) while
applying solder to cup and pre-fill cavity with solder.
(5)
Release foot pedal (8, fig. 4-45) and remove electrodes from cup terminal. Allow solder to cool and
clean flux residue from cup terminal.
(6)
Place electrodes in contact with the bottom of the cup cavity. Hold prepare conductor, with a heat shunt,
above the cup opening.
(7)
Press down on foot pedal (8, fig. 4-45) and wait for solder in the cup terminal to melt.
(8)
Insert conductor into the cup terminal and allow conductor to heat.
(9)
Release foot pedal (8, fig. 4-45) and remove electrodes from cup. Allow solder to cool completely before
removing heat shunt.
(10) Remove any flux residue from solder joint using alcohol.
Figure 4-46. Resistance Soldering a Cup Terminal.
4-48
|

