 |
|||
|
|
|||
|
|
|||
| ||||||||||
|
|
 TM 9-1240-375-34&P
0061 00
ASSEMBLY
2
10
1
10
11
9
9
7
4
3
6
8
5
1 fc 2 8 1
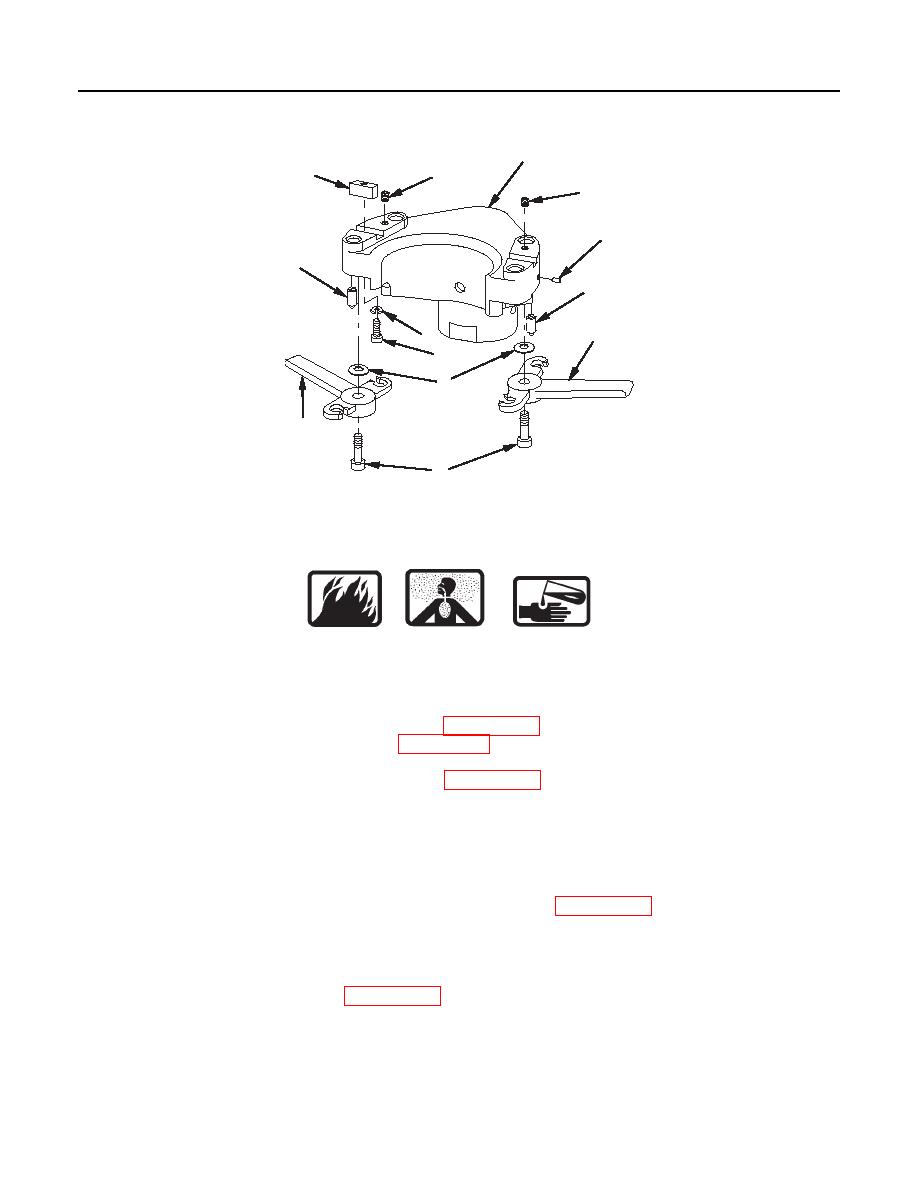
1.
Install two machine keys (1) in grooves of optical instrument support (2).
WARNING
Use sealing compound in well-ventilated area away from open flame. Sealing
compound is harmful to skin and clothing and may give off harmful vapor. Exercise
care whenever sealing compound is used.
2.
Apply a light coat of sealing compound (item 13, WP 0152 00) to threads of two socket capscrews (3).
Install two new lockwashers (4) (item 8, WP 0121 00) and two socket capscrews.
3.
Apply a light coat of sealing compound (item 13, WP 0152 00) to threads of two socket head capscrews
(5). Wipe off excess sealing compound with a clean wiping rag. Install two spring tension washers (6),
bevel down, and two socket head capscrews onto left manual control handle (7) and right manual
control handle (8). Tighten capscrews until snug.
4.
Install two detent plungers (9). Tighten to positive stop and turn back one-half turn.
5.
Install two setscrews (10) and apply sealing compound (item 13, WP 0152 00).
6.
Loosen two socket head capscrews (5) one-quarter turn. If properly adjusted, latch will feel slightly
loose.
7.
Apply sealing compound (item 13, WP 0152 00) to threads of two setscrews (11). Install setscrews and
tighten. Cover heads with sealing compound.
END OF WORK PACKAGE
0061 00-3/4 blank
|
|
Privacy Statement - Press Release - Copyright Information. - Contact Us |
