|
| |
3-6
TM 750-116
NOTE
Some early manufacture boresight inlet ports
were equipped with metric threads. To attach the
hose asembly to these units, it is necessary to use
the 10-32 adapter supplied with the purging kit.
Insert the adapter carefully and do not force the
adapter past its binding point.
(2) Perform purging procedure para 2-5.d.
(3) Purge instrument at 5 psig for 5 minutes.
(4) Install the rubber protective head cover on the
boresight.
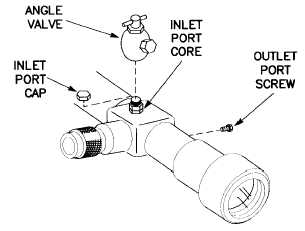
b. M26A1/M27A1 Muzzle Boresight (fig. 3-12).
Figure 3-12 M26A1/M27A1 Muzzle Boresight
(1) Release pressure from optical unit by removing
pneumatic inlet port cap and depressing valve core .
(2) Attach hose assembly to angle valve (special tool,
TM9-4933-259-14&P) and install angle valve on inlet
port.
(3) Turn angle valve T clockwise (CW) until snug.
(4) Perform purging and charging procedure para
2-5.b.
(5) Purge instrument at 5 psig for 5 minutes or until
all traces of moisture in optical unit are removed.
(6) Charge instrument at 3 psig maintaining pressure
for 10 seconds.
(7) Turn angle valve T counterclockwise (CCW) until
snug.
(8) Remove hose assembly and angle valve from inlet
port core.
(9) Leak test for minimum of 5 minutes.
3-8. MOUNTS, TELESCOPE.
a. Telescope Mount, M137 (fig. 3-13).
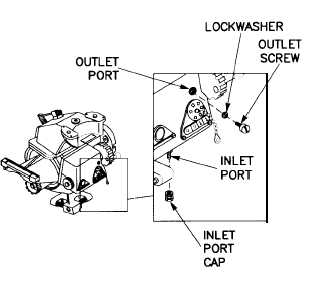
Figure 3-13 M137 Telescope Mount
(1) Perform purging procedure para 2-5.c.
(2) Purge instrument at 5 psig for 5 minutes.
b. Telescope Mount, M145/M145A1 (fig. 3-14).
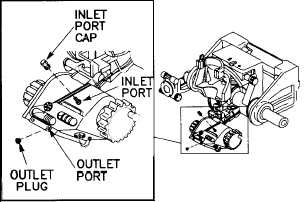
Figure 3-14 M145/M145A1 Telescope Mount
(1) Perform purging procedure para 2-5.c.
(2) Purge instrument at 5 psig for 5 minutes.
|


