DRAFT
TM 5-4210-249-13&P-2
0240
- - - - - - - - - - - - - - - - - - - - - - - - - - - - - - - - - - - - - -
TFFT00905A
3.
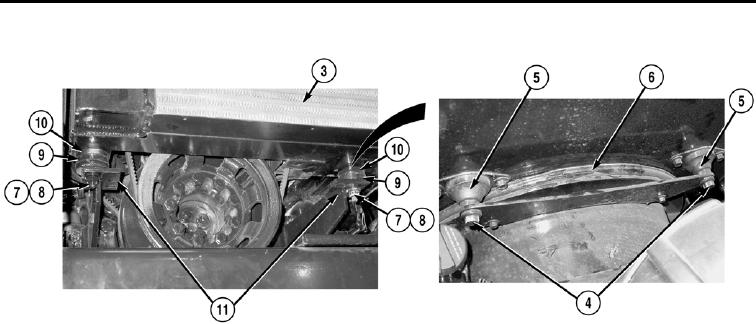
Remove two screws (4) from heat exchanger mounting bumpers (5) and support bracket (6).
NOTE
Fan shroud seal may stick to heat exchanger. Gently flex fan shroud seal all the way
around the fan shroud to loosen the seal before removing heat exchanger.
4.
Using a suitable lifting device, remove two nuts (7), mounting bumpers (8), washers (9), and heat
exchanger (3) from mounting studs (10) on two mounting brackets (11).
END OF TASK
INSTALLATION
1.
Using a suitable lifting device, install heat exchanger (3) on mounting studs (10) on two mounting
brackets (11) with washers (9), mounting bumpers (8), and nuts (7).
2.
Secure heat exchanger mounting bumpers (5) to heat exchanger support bracket (6) with two screws (4).
- - - - - - - - - - - - - - - - - - - - - - - - - - - - - - - - - - - - - - - - - - - - - - - - - - - - - -
0240-2

