|
| |
TM 5-4210-233-14&P-1
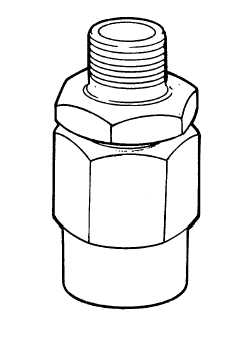
4-148. IN-LINE SINGLE CHECK VALVES
THIS TASK COVERS:
a.
Removal
c.
Follow-on Maintenance
b.
Installation
TOOLS REQUIRED
EQUIPMENT CONDITION
Tool Kit, General Mechanics, Automotive
Main Engine Shutdown (see para 2-12 .)
(Appendix B, Section Ill, Item 1)
Batteries Disconnected (see para 4-114 .)
All Air Tanks Drained (see para 4-157 .)
a.
Removal.
NOTE
There are four in-line check valves located in the brake system.
Refer to air schematics in Appendix G. One check valve is
located on the lower tank on the passenger side of the vehicle
(front service). The valve is in-line on the forward line. Another
check valve is located in-line on the air tank located in the rear
of the truck above the fuel tank (isolated emergency spring
brake release tank) fed by a black pressure line. The other two
are located on the top tank on the driver's side (rear service).
There is one valve in-line on each end of the tank.
NOTE
Refer to the locator view in para 4-147 and the air schematics in
Appendix G.
(1) Note direction of arrow on check valve body to
ensure correct installation.
(2) Tag and disconnect air line at check valve.
(3) Remove check valve.
b.
Installation.
(1) Install check valve making certain that it is installed
correctly with respect to the desired air flow. An
arrow indicating the direction of air flow is cast into
the body of the valve.
(2) Install air line.
c.
Follow-on Maintenance.
(1) Connect batteries (see para 4-114).
(2) Check for leaks as described in para 4-147 .
4-423
|