|
| |
TRUCK SERVICE MANUAL
TM 5-4210-230-14&P-1
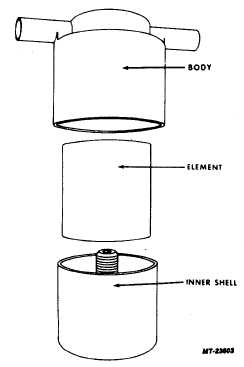
Removal and Installation Procedures of Element (Fig. 5)
1.
Turn inner shell counter clockwise with hands or
suitable size shop tool.
2.
Remove element from shell.
3.
Clean inside of air cleaner body and inner shell.
4.
Clean or replace element.
5.
Position element in inner shell and tighten shell snug.
Then turn inner shell 1/8 additional turn.
Fig. 5. Exploded View of Replaceable Element Type Air
Cleaner
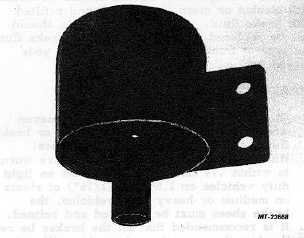
Maintenance Interval of Throw-Away Type (Fig. 6)
19,000 km (12,000 miles)
Remove complete air cleaner assembly and install
new air cleaner.
Vehicles operating under multi-stop or severe dust
conditions will require replacement more often.
Fig. 6. Throw-Away Type Air Cleaner Assembly
CAUTION
A vehicle accident could result if the vehicle is
operated while any of the forgoing items need
attention or if any other brake system service
requirements are suspected.
CTS-2055S Chapter 1 Page 6
PRINTED IN UNITED STATES OF AMERICA
|


