|
| |
TM5-4210-229-14&P
5-13.
STARTER REPAIR. (Continued).
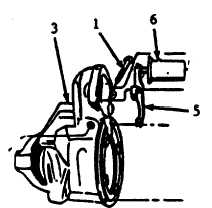
b.
Shift lever and plunger removal.
(1)
Remove shift lever pilot bolt (1).
(2)
Remove center bearing screws (2) and
remove drive gear housing (3) from armature
shaft (4). Shift lever (5) and plunger
assembly (6) will now fall away from starter
clutch (7).
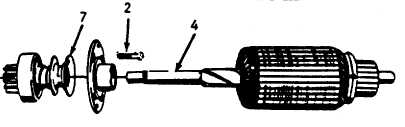
c.
Remove drive assembly from shaft.
(1)
Remove
thrust
washer
collar
(1)
from
armature shaft (2).
(2)
Slide a 5/8 inch deep socket or piece of pipe
of suitable size over shaft against retainer (3)
as a driving tool. Tap tool to remove retainer
off snapring (4).
(3)
Remove snapring (4) from groove in shaft.
NOTE
If snapring is distorted, it will be necessary to
use a new one on reassembly.
(4)
Remove retainer (3), clutch assembly (5),
from armature shaft (2).
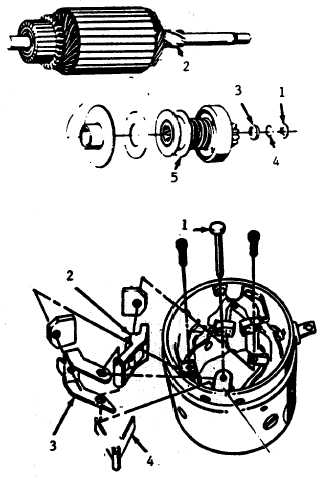
d.
Replace brush holder.
(1)
Remove brush holder pivot pin (1) which
positions one insulated (2) and one grounded
bush (3).
(2)
Remove brush spring (4).
(3)
Replace brushes as necessary.
5-32
|