 |
|||
|
|
|||
|
|
|||
| ||||||||||
|
|
 TM5-4210-224-14&P
6-16.
CONNECTING ROD AND PISTON MAINTENANCE. (Continued)
b. Lubricate the piston and rings with engine oil
INSTALLATION
NOTE
Make sure the cylinder walls are clean.
Lubricate the cylinder wall lightly with
engine oil (Appendix D, Item 22).
Install used pistons in the cylinder from
which they were removed. Install new
pistons in the cylinders for which they
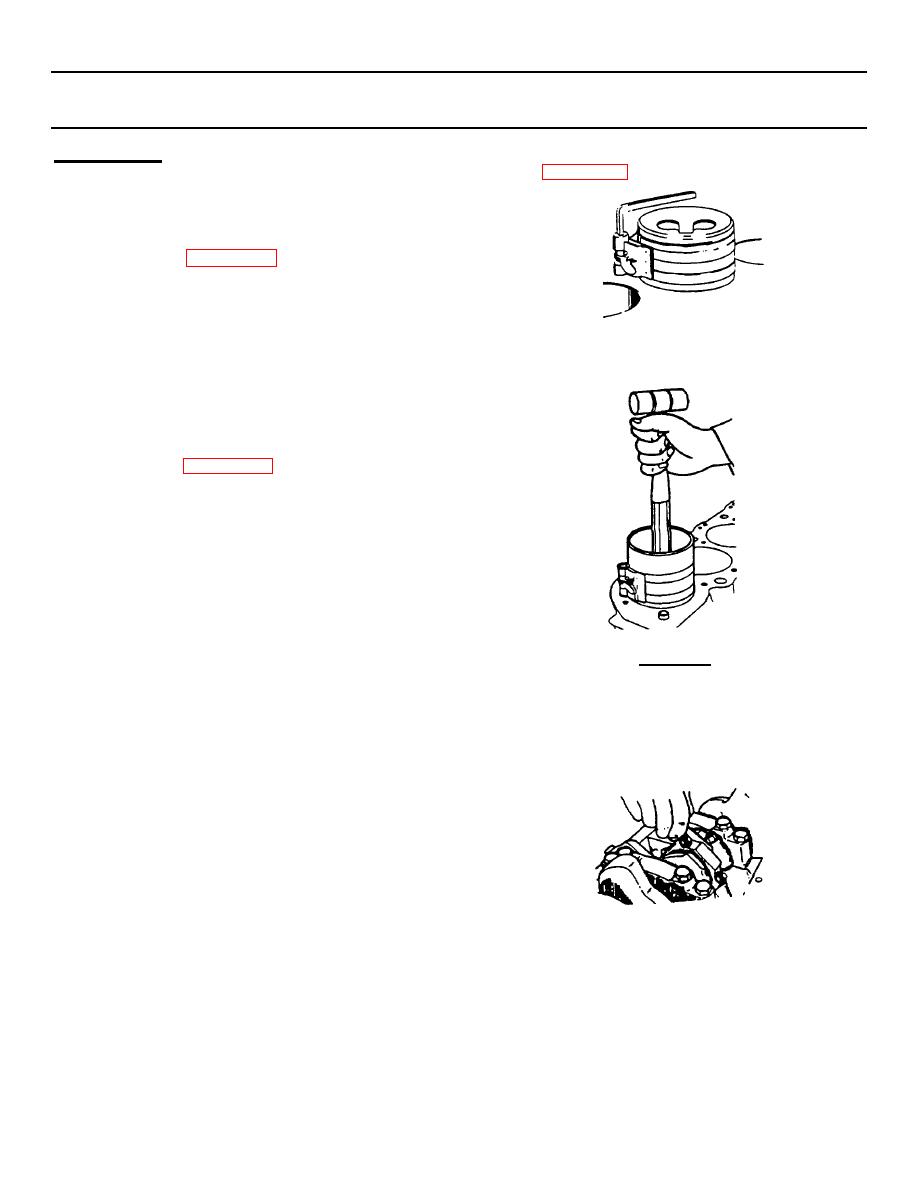
c. Locate the piston ring end caps and without
were fitted.
disturbing the ring end cap location, install the
compressor over the piston.
If replaced, be certain that the new
connecting rod bearings are the proper
size.
a. Lubricate the connecting rod bearing with
engine oil (Appendix D, Item 22) and install the
bearings in the connecting rod and connecting
rod cap.
NOTE
Measure
connecting
rod
bearing
clearance. If the clearance exceeds
0.0018 0.0039 inch, select a new,
correct size bearing and remeasure the
clearance.
CAUTION
Each connecting rod and bearing cap
should be marked, beginning at the
The piston must be installed so that the
front of the engine. Cylinders 1,3,5, and
depression in the piston crown is
7 are the left bank and 2,4,6, and 8 are
towards the outside of the engine. The
the right bank. The numbers on the
connecting rod bearing tang slots must
connecting rod and bearing cap must
be opposite the camshaft.
be on the same side when installed in
the cylinder bore. If a connecting rod is
ever transposed from block or cylinder
to another new connecting rod bearings
should be fitted and the connecting rod
should be numbered to correspond with
the new cylinder number.
f. Place the piston in its matching bore and using
light blows with a hammer handle, tap the piston
down into its bore.
6-25
|
|
Privacy Statement - Press Release - Copyright Information. - Contact Us |
