 |
|||
|
|
|||
|
|
|||
| ||||||||||
|
|
 TM 5-4210-224-14&P
5-6. RADIATOR REPAIR.
(Continued)
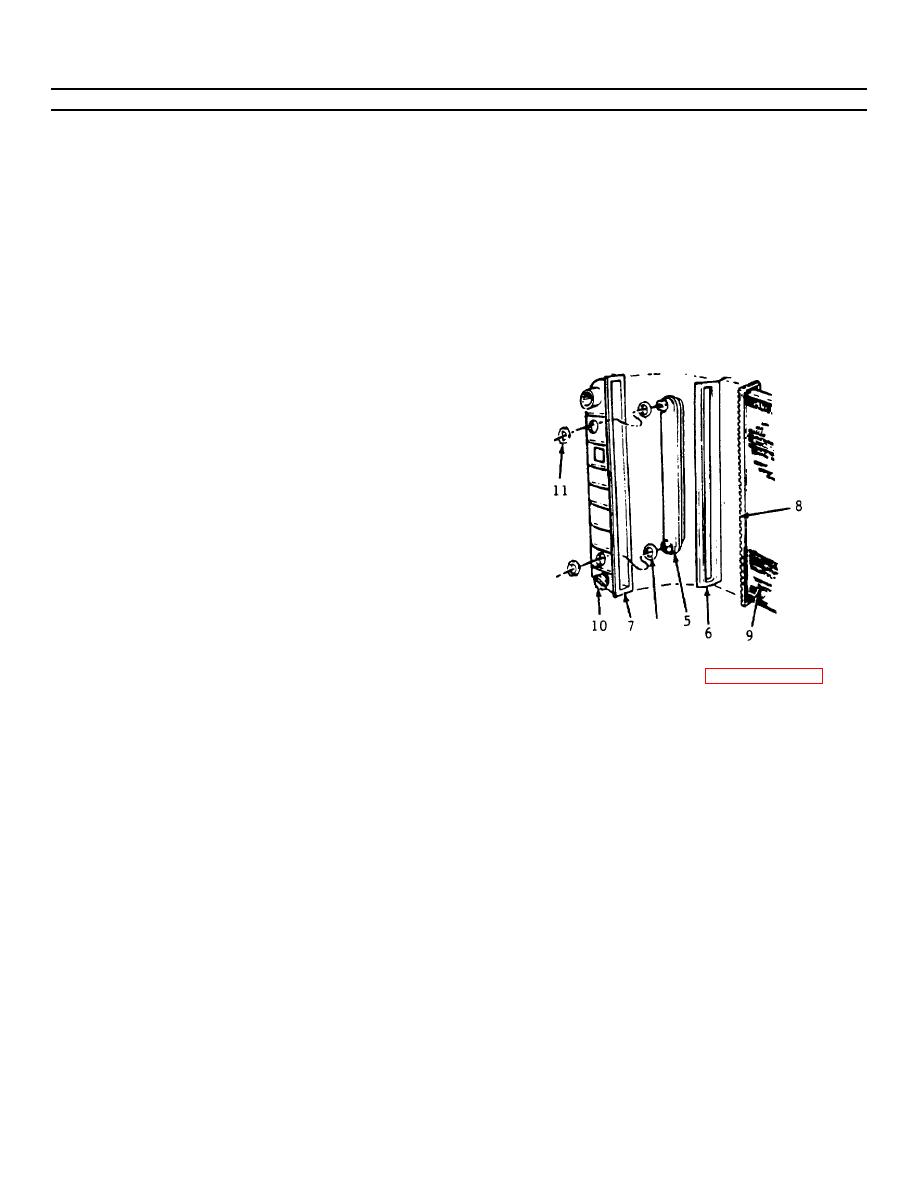
(4) Discard the old rubber gasket (12) then
(7) Remove the oil cooler(s) (5) and install it
clean and dry seal areas.
in the new tank, if used.
(5) Place rubber gasket (12) on a new oil
(8) Dip or coat the new tank gasket (6) in
cooler (5) and place onto the outlet tank
engine coolant and position it on the
(7) fitting holes. Be careful not to loosen
header surface. The coolant helps hold
or misalign the gasket (12). Gasket must
the gasket in place.
be installed dry and be free of dirt and oil.
(9) Position the tank (7) and gasket (6) to the
(6) Install and tighten nuts (11) snugly onto
header (8), clamp it in place and secure it
the fittings. Torque nuts (11) to 15 ft-lbs
by bending four clinch tabs.
(20 N.m). Overtorquing could cut the
rubber gaskets (12).
(10) Clamp remaining clinch tabs around the
header using the clinching tool or pliers.
NOTE
Tighten the clinch tabs as you
would cylinder head bolts, starting
at the center and working out to
the ends.
(11) Replace the core (9) if there are more
than three tabs broken on one side or two
adjacent tabs broken.
(12) Install the drain cock (10) if removed.
(13) Test the radiator for leaks.
f. Oil Cooler Replacement.
(1) Remove the outlet tank (7) as previously
(7) Replace the tank (paragraph 4-81).
outlined.
(8) Test the radiator.
(2) Remove nuts (11) from the oil cooler
fittings.
g. Recore.
If the radiator core is damaged beyond repair and
(3) Remove the oil cooer (5) and gasket (12)
l
the other parts are serviceable, install the original
from the tank.
inlet and outlet tanks, oil cooler, radiator cap, and
valve along with the new core and new gaskets.
5-10
|
|
Privacy Statement - Press Release - Copyright Information. - Contact Us |