|
| |
TM 5-4210-220-34
3-7.
TRANSMISSION - Continued
CAUTION
Be sure the clutch plate next to the piston is a thick plate.
(3) Install backplate and white color coded snap ring. Be sure the gap of the snap ring is at the top of the
transmission housing.
(4) Check the third clutch clearance by inserting gage J24193 between the snap ring and the backplate of
the third clutch. The clearance should be 0.060 1.120 in. (1.52 3.05 mm). Any dimension between 0.060
0.120 in. (1.52 3.05 mm) is satisfactory. Replace worn plates with new plates to establish the desired
clearance. When the assembly is satisfactory, continue assembly.
(5) Prior to the installation of the fourth-clutch assembly, be sure the bearing races at both the front and back
are in place.
(6) Check the seal rings, bearing, and race are in place on the center support. Ensure the inner lube
direction lip of the race on the center support is 0.233 In. (5.9 mm).
NOTE
Do not remove the support ring from the fourth-
clutch housing.
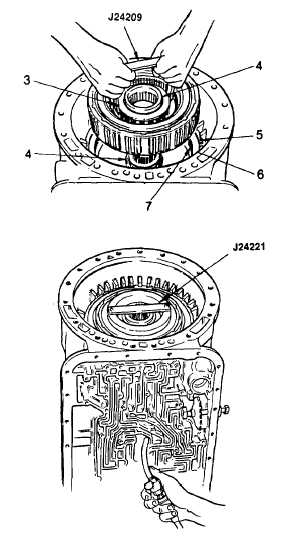
(7)
Place lifting bracket J24209 under the
spring
retainer
of
the
fourth-clutch
assembly. Aline the internal-splines of the
third-clutch plates and the sun gear shaft to
the fourth-clutch housing. Install the
housing.
(8)
Be sure the bearing race at the top (front) of
the clutch is in place. If not, lubricate it with
petroleum jelly (item 21, Appendix B) and
install.
an.
Installation Of Forward Clutch Assembly
(1)
Prior to installation of the forward
clutch assembly, make sure the thrust
bearing race and thrust bearing have been
installed at the rear of the clutch assembly.
The other bearing race was previously
installed in fourth clutch assembly.
(2)
Install
alinement
fixture
J24221.
Engage the fourth-clutch plates by applying
air pressure to the fourth-clutch piston. If
all plates do not engage tool J24221, the
fixture will rise slightly when air pressure is
applied.
3-77
|

