|
| |
TM 5-4210-220-34
2-19.
ENGINE - Continued
WARNING
Ensure engine is properly supported before removing the front engine mounts (2).
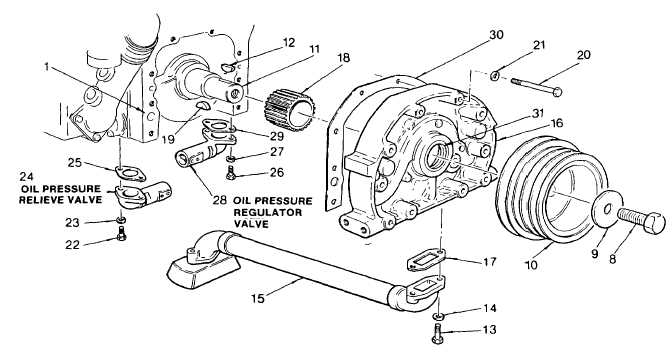
(3)
Remove capscrews (7) and remove both front engine mounts (2) and washers (5).
(4)
Remove the pulley retaining bolt (8) and washer (9).
(5
Using tapped holes in pulley (10), attach mechanical puller J24420A using correct size bolts. Tighten the
pressure screw into the end of the crankshaft and remove the pulley. When using a puller, follow tool
manufacturers recommendations.
(6)
Remove key (12) from crankshaft (11).
(7)
Remove the bolts (13), and lockwashers (14) that secure the oil inlet pipe and screen assembly (15) to the
crankshaft front cover (16). Remove and discard gasket (17).
(8)
Remove crankshaft front cover mounting capscrews (20), and lockwashers (21).
(9)
Strike the edges of the crankshaft cover (16) alternately on each side with a soft faced hammer to free it from
the cylinder block dowel pins. Then pull the cover straight off the end of the crankshaft (11).
(10)
Remove and discard gasket (30).
(11)
Remove drive hub (18), and key (19), from crankshaft (11).
(12)
Inspect and repair oil pump as detailed in REPAIR following.
2-229
|