|
| |
TM 5-4210-220-34
2-13.
FIRE PUMP - Continued
2-13.13 Bearing Housing Repair.
This task covers
a.
Disassembly
b.
Inspection
c.
Assembly
TOOLS
MATERIAL/PARTS
Shop Equipment, Automotive
10, Appendix B Dry Cleaning Solvent
Maintenance and Repair,
13, Appendix B Emery Cloth
NSN 4910-00-754-0705
15, Appendix B Gear Oil
1, Appendix D Extractor Tool Assembly
16, Appendix B Grease
2, Appendix D Bearing Removal Tool
29, Appendix B Threadlock Liquid
3, Appendix D Pump Shaft Support Fixture
MS178/69 Cotter Pin
4, Appendix D Thread Protector Tool
UMP 9392 Gasket
5, Appendix D Bearing Installation Tool
UMP 9700 O-ring
8, Appendix D Bearing Installing Tool
UFP 2609 Tab Washer
UMP 9392 Gasket
EQUIPMENT CONDITION
UMP 9392 Gasket
Fire Pump Removed from Truck
UMP 9404 Seal
(see TM 5-4210-220-12)
UMP 9395 Seal
Water Ring Primer Removed (see para. 2-13.7)
Volute Body Removed (see para. 2-13.3)
Impeller Removed (see para. 2-13.4)
Pump Head Removed (see para. 2-13.6)
Revolution Counter Removed (see para. 2-13.12)
DISASSEMBLY
Damage to shaft sealing surfaces will
warrant replacement of pump shaft. Do
not scratch or mark sealing surfaces.
(1)
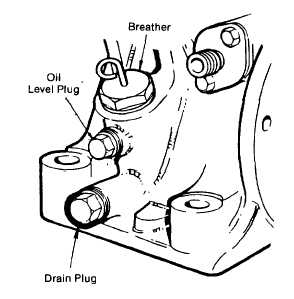
Remove bearing housing drain plug from
bearing housing and drain oil.
(2) Remove the cotter pin (2) securing the
slotted nut (1) on the drive flange end of the
pump shaft (38).
(3)
Place
pump
shaft
support
fixture
(3,
Appendix D) over the impeller shaft splines.
While holding pump shaft support fixture,
remove nut (1) and washer (3).
(4)
Remove the pulley and flange assembly from pump shaft (38). Separate pulley (7) from drive flange (6) by
removing capscrews (9) and lockwashers (8). Remove O-ring (5) from seal mounting (4).
(5)
Remove key (37) from pump shaft (38).
2-122
|

