|
| |
TM 9-254
6-10.
Connector Contact Pins Continued
(2)
Insert the removal tool tip over the contact with a firm pressure until the removal tool tip bottoms out
against the contact. This will-release the contact retention clips that secure the contact into the
connector.
(3)
Push in on the plunger slide to eject the contact from the rear of the connector.
c.
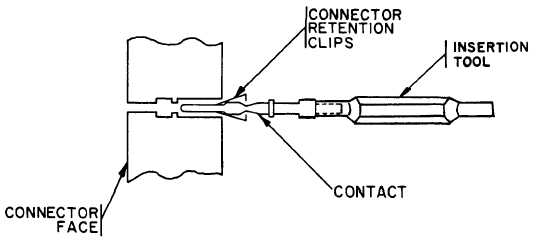
Installation of Front Release Connector Contact (fig. 6-16).
(1)
Using the proper size insertion tool, push the contact through the rear side of the plug until it bottoms in
the plug cavity. This will seat the contact retention clips in the plug cavity.
(2)
Lightly but firmly pull back on the contact barrel with the needle nose pliers. If the contact retention clips
have seated, the contact can not be pulled from the plug. If the contact retention clips have not seated,
repeat step (2).
Figure 6-16. Installation of Front Release Connector Contact
d.
Removal of Termi-Twist Contacts (figs. 6-17 and 6-18).
(1)
Select the correct tool for the contact to be removed (table 6-1).
6-12
|