 |
|||
|
|
|||
|
|
|||
| ||||||||||
|
|
 TM 9-1240-375-34&P
0056 00
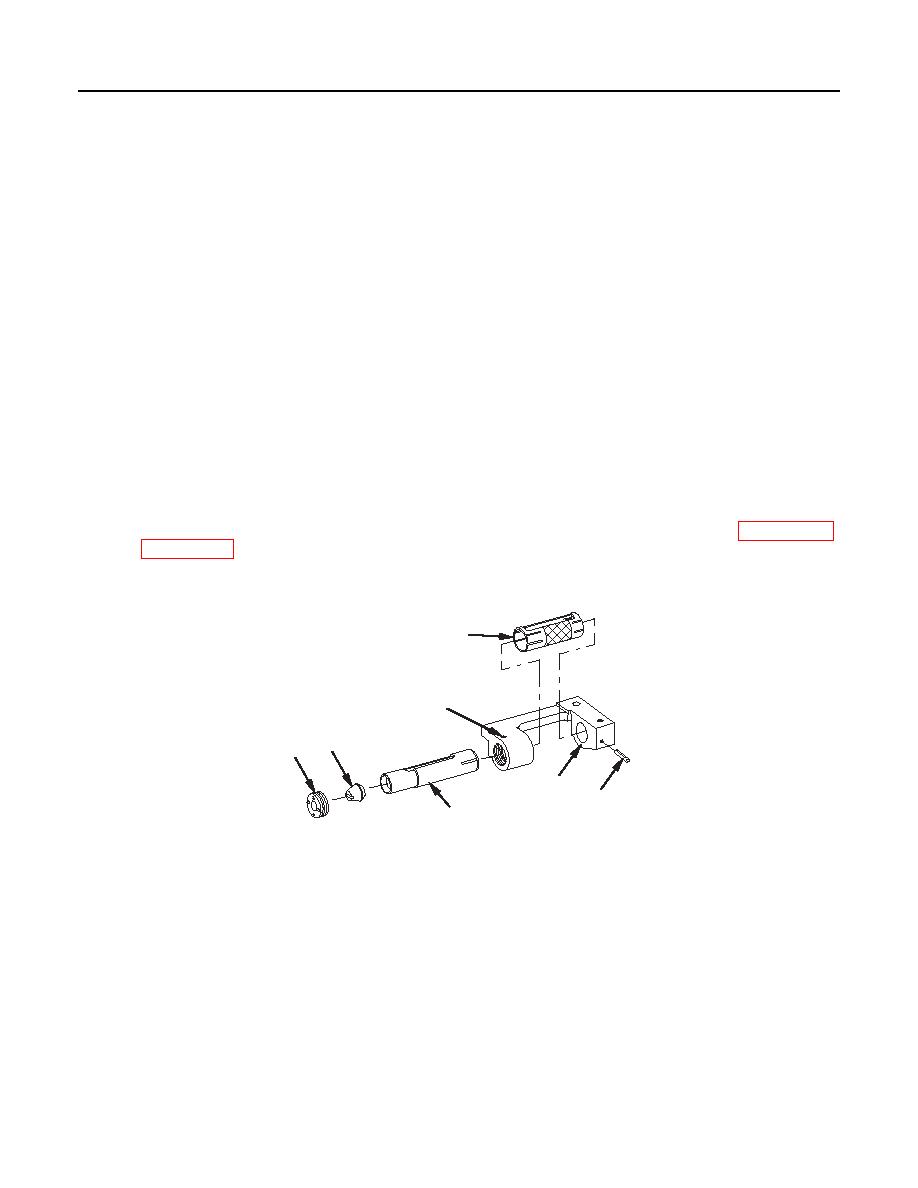
1.
Remove sealing compound and loosen setscrew (1).
2.
Remove sealing compound from level assembly and remove externally threaded ring (2).
3.
Remove eccentric (3).
4.
Slide fire control level (4) from vial bracket (5), and lift out level cover (6).
5.
If damaged, remove setscrew (1).
6.
If damaged, remove headless straight pin (7).
REPAIR OR REPLACEMENT
1.
Replace fire control level assembly if any threads are stripped or vial bracket is damaged.
2.
Fire control level may be replaced if it is cracked but still illuminated. Dispose of broken fire control
level in accordance with RSO instructions. If fire control level is cracked and not illuminated, notify
RSO. Perform wipe test under RSO supervision. Remove, bag, and secure assembly under RSO
direction and await wipe test results. If contaminated, dispose of assembly per RSO instructions. If
assembly is not contaminated, replace fire control level. Dispose of replaced fire control level per RSO
instructions.
3.
Repair is by replacement of authorized parts that do not meet inspection criteria. Refer to WP 0111 00
and WP 0116 00.
ASSEMBLY
3
2
6
7
4
1
5
1 fc 2 3 3
1.
If removed, install new headless straight pin (1).
2.
If removed, install, but do not tighten, new setscrew (2).
3.
Place level cover (3) in vial bracket (4).
4.
Slide fire control level (5) into vial bracket (4) and level cover (3).
5.
Install eccentric (6), and screw in externally threaded ring (7).
0056 00-3
|
|
Privacy Statement - Press Release - Copyright Information. - Contact Us |
