|
| |
TM 750–116
(7) Purge instrument for specified time. If moisture
is still present, a longer purge time may be required.
(8) Close the regulator valve (CCW).
(9) Watch low pressure gage and listen for purge re-
lief valve to close.
(a) Relief valve should close at specified pressure.
(b) If pressure relief valve does not close before
reaching the lowest pressure indicated, replace the pressure
relief valve and repeat procedure.
(10) Leak test by allowing instrument to stand for
specified time.
(a) Watch low pressure gage for indication of nitro-
gen leaks. (Low pressure gage will indicate decreasing
pressure.) If no leak is indicated, go to step 11.
(b) If pressure reduces, perform leak check:
— Apply a soap solution to all sealed joints and
screws.
— Open regulator valve (CW) until specified
pressure registers on low pressure gage.
—When pressure relief valve opens, close regu-
lator valve (CCW).
— Watch for bubbles to appear around seals and
screws.
— Refer to appropriate maintenance manuals to
replace defective seals.
— When defective seals are replaced, repeat
purge and charge procedure.
(11) If no leaks are found on instrument, perform leak
test on purge kit and hose connection while still connected
to instrument. Repeat procedure until all leaks are elimi-
nated.
(12) Remove hose assembly.
(13) Close main tank valve (CW). Apply soap solu-
tion to the valve core. If a Ieak is found, replace valve core
of instrument and repeat purge and charge procedure.
(14) Install inlet port cap on instrument.
(15) For bleed down procedures, refer to para 2-3.
b. Purge and Charge - Inlet Port Entry, Outlet
Port Screw(s) This procedure is used when instrument
is designed to hold a charge.
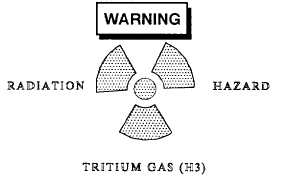
HANDLE WITH CARE. IN THE EVENT
THE RADIOLUMINOUS SOURCE IS
BROKEN, CRACKED, OR SUDDENLY
LOSES ILLUMINATION, DO NOT AT-
TEMPT TO REPAIR. IMMEDIATELY
WRAP DEVICE IN PLASTIC AND
NOTIFY THE LOCAL RADIATION PRO-
TECTION OFFICER (RPO).
(1) Remove inlet port cap of instrument to be purged
and charged.
(2) Inspect valve stem for cleanliness and presence of
valve core. Remove any dirt or foreign matter.
Ensure regulator valve is closed (counter-
clockwise - (CCW) or damage may occur to
regulator.
To avoid damage to instruments being
purged and charged, do not exceed maxi-
mum pressure. Unless otherwise noted for
specific instrument, maximum pressure is 10
psi.
(3) Connect hose assembly to valve stem on instru-
ment.
(4) Open main valve on nitrogen tank (CCW).
(5) Remove outlet port screw(s) (unless otherwise
directed for specific instrument) and any accompanying
gasket/preformed packing.
(6) Open regulator valve clockwise (CW) until speci-
fied purge pressure is indicated on low pressure gage.
(7) Watch low pressure gage and listen for gas escap-
ing from outlet port. Do not allow pressure to exceed maxi-
mum specified pressure.
(8) Purge instrument for specified time. If moisture
is still present, a longer purge time may be required.
(9) Reduce pressure to 1 psi.
2-4
|

