|
| |
TM 5-4210-233-14&P-1
5-7. DRIVE SHAFTS, UNIVERSAL JOINTS AND YOKES - Continued
(9)
Support removed end of drive shaft using mechanics wire.
(10)
Remove the bearing plates from the opposite end of the drive shaft similar to steps (3) through (9)
preceding.
(11)
Carefully maneuver universal joint cross (5) out of the end yokes(4 or 7). Do not use force as this
can damage the bearing surfaces.
b.
Inspection of Drive Shafts.
(1)
Using a clean, dry, lint free cloth (Item 42,
Appendix E) wipe exposed universal joint cross
journals.
(2)
Visually inspect exposed universal joint cross
journals and needle bearings in bearing plates.
Look for defects caused by lack of lubrication
and physical damage. If corrosion, pitting,
unusual wear or missing bearing needles is
evident, the universal joint must be replaced.
(3)
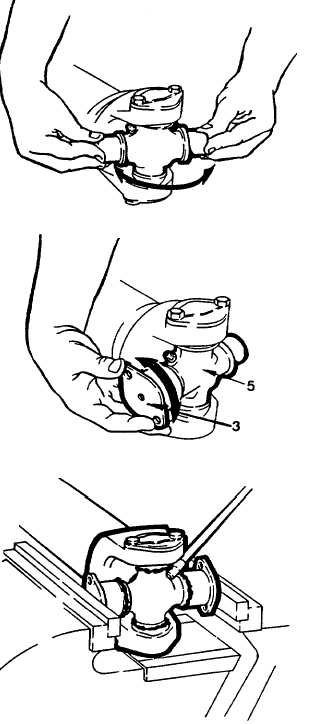
Check the remaining two universal joint
bearings. Grasp the universal joint cross as
shown, and oscillate the cross. Binding or
looseness indicates a defective bearing. If
damage is evident, the universal joint must be
replaced.
(4)
Apply a small amount of grease (Item 15,
Appendix E) to needle bearings of removed
bearing plates.
(5)
Install the bearing plates (3) to the universal
joint cross (5).
(6)
Turn and test each bearing plate on the cross
journals as shown. The movement must be
smooth and resistance free.
(7)
Install universal joint in a vise so the loose
bearing plates are clamped to the cross. Using
a grease gun, lubricate the universal joint until
grease (Item 15, Appendix E) is expelled from
all four bearing plates. If grease nipple is
blocked, remove and replace.
(8)
Remove universal joint from vise and tempor-
arily tape or wire bearing plates to cross.
(9)
Visually
inspect
drive
shafts
for
dents,
excessive corrosion, cracked welds, or missing
balance weights.
(10) If a drive shaft is damaged it should be replaced
along with the universal joints.
5-29
|