|
| |
TRUCK SERVICE MANUAL
TM 5-4210-230-14&P-1
BODIES AND CABS
INSPECT CAB STRUCTURE FOR DAMAGE
With side panel removed, inspect remainder of cab for
damage. Look especially for and repair:
1.
Damage to cab sill welds.
2.
Loosening of floor panels.
3.
Underbody bent out of alignment. (This step can
vary with each job. Keep in mind you are trying to
return cab to its original condition.)
Reweld any cracked or missing welds. The sill side inner
panel on the cab underbody must be straight and flat.
ALIGN NEW SIDE PANEL TO CAB
1.
Position and clamp new side panel assembly to side
of cab.
2.
Raise roof outer panel sufficiently to insert windshield
pillar top corner between inner and outer roof panels.
3.
Apply heat expanding type sealer (Plastisol or
equivalent) to this seam.
4.
Align panels to establish windshield opening and
install "C" clamps to secure.
5.
Align remaining joints at dash panel, cowl, roof panel
and back panel using "C" clamps to hold new side
panel in place.
WELDING SIDE PANEL TO CAB
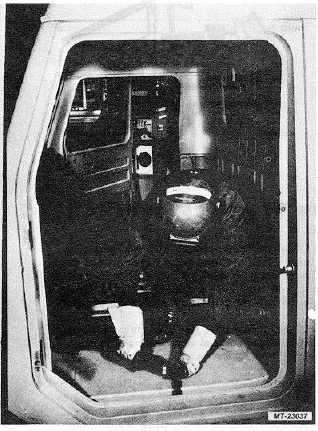
1.
Using MIG welder inside cab (Fig. 48), plug weld
around door opening through holes drilled out of
original cab panels during side panel removal.
CAUTION
Adjust welder so as not to damage or burn
sheet metal when performing these welds.
2.
Where drilled holes are not accessible such as at
bottom of rocker panel, use 2.5 cm (1 inch) seam
welds spaced 7.5 cm (3 inches) apart to secure
rocker panel to sill side inner panel.
Fig. 48. Using MIG Welder For Plug Welds
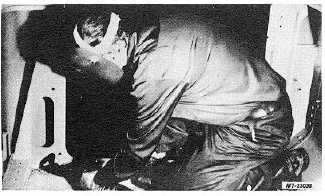
3.
At inside of cab weld base of inner side panels to sill
side inner panel (Fig. 49). Note: 80" wide cabs do not
use a seam weld at cowl seam joint but have a panel
extension on sill side inner panel to be plug welded to
inside of side panel.
Fig. 49. Seam Weld At Inside Of Side Panel
CTS-2714R Page 27
PRINTED IN UNITED STATES OF AMERICA
|