|
| |
TRUCK SERVICE MANUAL
TM 5-4210-230-14&P-1
WHEELS, RIMS, TIRES
to clean an injury if a power buffer equipped with a fine
wire 1brush is used. Care must be taken not. to buff
through the innerliner. Clean the awl needle and dip in
self-vulcanizing fluid and from the inside of the tire,
force the needle through the puncture until the point
extends beyond the tread (Fig. 15).
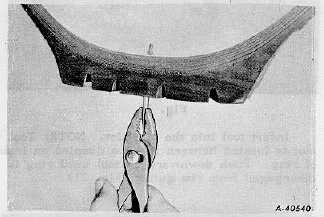
3.
Remove the detachable handle from the needle. Cut a
3.175 mm (1/8") strip of filler rubber and place it into
the hole of the needle with the end of the rubber strip
extending beyond the needle. Pull needle through the
tire with a pliers (Fig. 16). Filler rubber will remain in
puncture. Using an awl, pack excess rubber flush with
inside of tire.
Fig. 16
Fig. 17
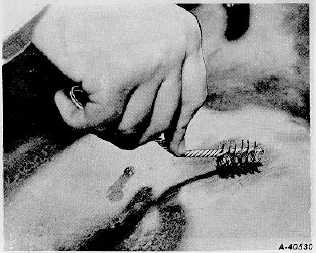
4.
With a wire brush (Fig. 17) or a power buffer,
thoroughly roughen an area about the injury slightly
larger than patch and within previously cleaned surface
area. Re-
move all traces of lubricant, foreign material, etc. Do
not use more solvent after buffing.
The next three steps apply only to the hot patch method.
5.
Remove backing from patch and carefully center it over
injury. Place a clamp over patch and tighten clamp
only finger tight (Fig. 18).
6.
Ignite patch and allow it to cool for at least 15 minutes
or until cool to the touch. Carefully remove metal pan
and ashes remaining in tire.
7.
Remount tire. Inflate to recommended operating
pressure. Then check to make sure injury is sealed.
Fig. 18
The next three steps apply only to the cold patch method.
8.
Apply self-vulcanizing cement over buffed area and
allow it to dry for a minimum of five minutes. This time
factor is important.
9.
Remove backing from patch base and place patch over
injury. Press down firmly, especially at the edges, for
good adhesion (and easy removal of paper cover) (Fig.
19).
10.
Remount tire. Inflate to the recommended --operating
pressure. Then check to make sure injury is sealed.
CTS-2032N Page 7
PRINTED IN UNITED STATES OF AMERICA
|