|
| |
TM5-4210-229-14&P
4-60. FAN SHROUD REPLACEMENT (Continued).
d.
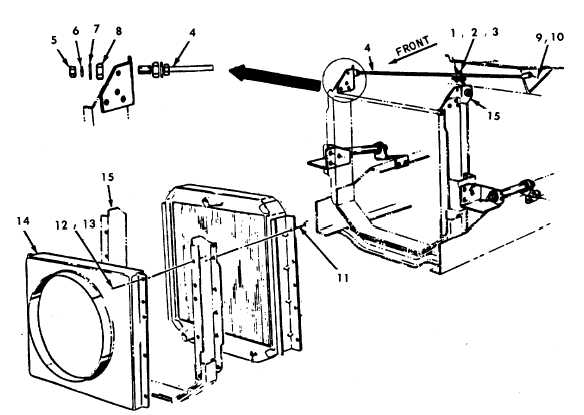
Cut nylon ties on cross braces (4) and remove two cross braces (4).
e.
Remove ten nuts (11), bolts (12), and washers (13) securing fan shroud (14) to radiator support (15).
f.
Remove fan shroud (14).
INSTALLATION
a.
Install fan shroud (14) and secure to radiator support (15) using ten washers (13), bolts (12), and nuts (11).
NOTE
Remember to secure horn to vehicle with street side brace bolt (9).
b.
Secure back end of two cross braces (4) using washers (10) and bolts (9).
c.
Secure front end of each cross brace (4) using insulator (8), flat washer (7), lockwasher (6) and nut (5).
d.
Secure hose to cross braces (4) using nylon ties.
e.
Secure cross braces (4) using U-bolt (1), nuts (2), and washers (3).
f.
Connect top radiator hoses (paragraph 4-63).
g.
Install fan and clutch (paragraph 4-61).
h.
Fill cooling system (paragraph 4-58).
4-75
|