 |
|||
|
|
|||
|
Page Title:
VENT/WINDOW RUN CHANNEL REPLACEMENT. |
|
||
| ||||||||||
|
|
 TM 5-4210-224-14&P
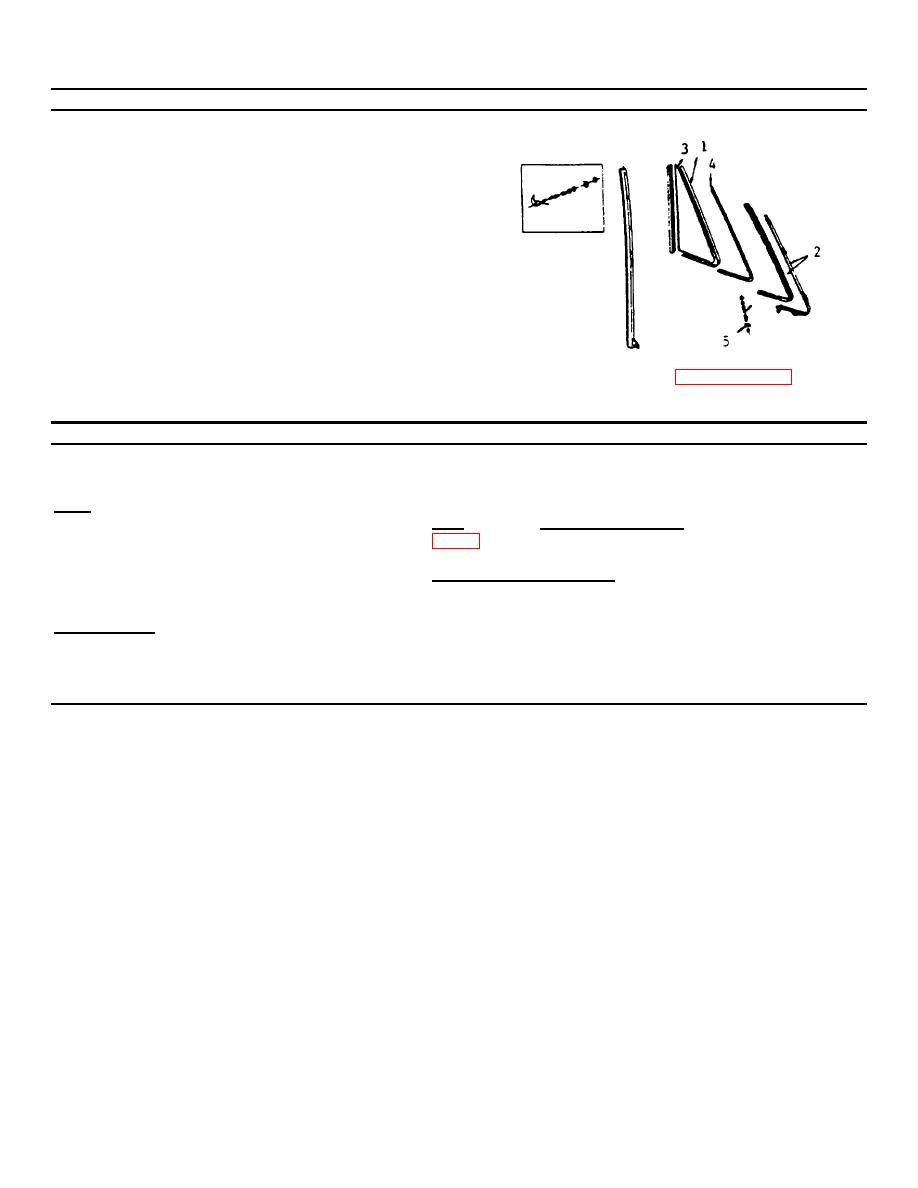
4-172. VENT GLASS REPLACEMENT (Continued).
f.
Press the glass (3) and the filler (1) into the
channel (2) until firmly seated.
g. Trim off excess filler material (1) around and at
the end of the channed l (2).
h. Bend the tabs on the adjustment nut (5) away
from the nut.
i.
Adjust the vent by placing a wrench on the
adjusting nut and turning the vent window to the
desired tension.
j. Bend the tabs over the hex nut (6) on the base of
k. Install the door trim panel (paragraph 4-176).
the assembly.
4-173. VENT/WINDOW RUN CHANNEL REPLACEMENT.
INITIAL SET-UP
Tools
Equipment Condition
General Mechanics Tool Kit
Para.
Condition Description
Window Handle Clip Removing Tool
Trim Panel Removed
General Safety Instructions
Engine OFF.
Transmission in (N) neutral.
Materials/Parts
Parking brake and micro-brakelock set.
Curbside Channel (20354945)
Streetside Channel (20354946)
REMOVAL
a. Lower glass to the bottom of the door.
d.
Remove the door ventilator screws (4) and
spacers (5).
b.
Disconnect the run channel molding (1) by
pulling the molding out of the vent assembly (2)
e.
Remove the door vent/window run channel
only.
assembly from the vehicle by pulling the top of
the vent backwards, away from the door frame
c. Remove the door panel to run channel bolt (3).
and lifting and rotating the assembly out of the
door.
4-234
|
|
Privacy Statement - Press Release - Copyright Information. - Contact Us |
