|
| |
TM 5-4210-220-12
4-18. PUMP, PIPING, AND VALVES - Continued
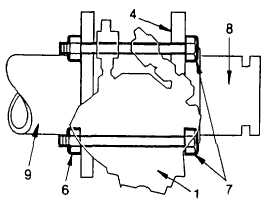
(11)
Install capscrews (7) and new locknuts (6) and tighten
to 150 ft lb (203 Nm).
(12)
Lower actuator assembly (1) from frame side
member. Discard mechanics wire .
(13)
Lift the actuator assembly into position and aline the
actuator coupling (10) with the roll pin (11).
(14)
Aline actuator assembly mounting holes with valve
and install machine screws.
(15)
Wipe off excess gasket eliminator from pipe flanges
(8 and 9).
(16)
Allow gasket eliminator to cure for at least one hour prior to testing for leaks.
(17)
Be sure valve operates. Operate from cab (MODE switch set to CFR) and from structural control
panel (MODE switch set to STRUCT). Tighten/remake connections as required.
(18)
Be sure cab lamp illuminates when valve is open. Adjust microswitch as required.
4-233
|